Watercolor painting PDFs offer accessible learning, combining visual guidance with downloadable resources for aspiring artists․ These tutorials simplify techniques and supply knowledge․
Discover a convenient way to learn watercolor painting, accessing lessons and exercises anytime, anywhere, fostering skill development at your own pace․
What is a Watercolor Painting Tutorial PDF?
A watercolor painting tutorial PDF is a digital document designed to instruct individuals on the art of watercolor painting․ These PDFs typically encompass a range of learning materials, including step-by-step instructions, illustrative images, and sometimes even accompanying video links․ They serve as a portable and readily accessible resource for artists of all skill levels, from complete beginners to those seeking to refine their techniques․
These documents often cover fundamental aspects like material selection – paints, paper, brushes – and core techniques such as wet-on-wet, dry brush, and color mixing․ Many PDFs also include simple projects, like painting leaves or flowers, to help learners practice and build confidence․ The format allows for self-paced learning, enabling artists to revisit sections as needed and build a strong foundation in watercolor painting․
Why Use a PDF Tutorial?
Watercolor painting tutorial PDFs offer unparalleled convenience and flexibility․ Unlike traditional classes, you can learn at your own pace, revisiting sections as needed, and practicing whenever inspiration strikes․ They eliminate scheduling conflicts and geographical limitations, making art education accessible to everyone with an internet connection․
PDFs are also cost-effective, with numerous free resources available, and provide a portable learning experience – access tutorials on your tablet, phone, or computer, anywhere you go․ Furthermore, they often include downloadable templates and printables, enhancing the learning process․ They demystify the process, guiding beginners through supplies and techniques, fostering confidence and a love for watercolor painting․
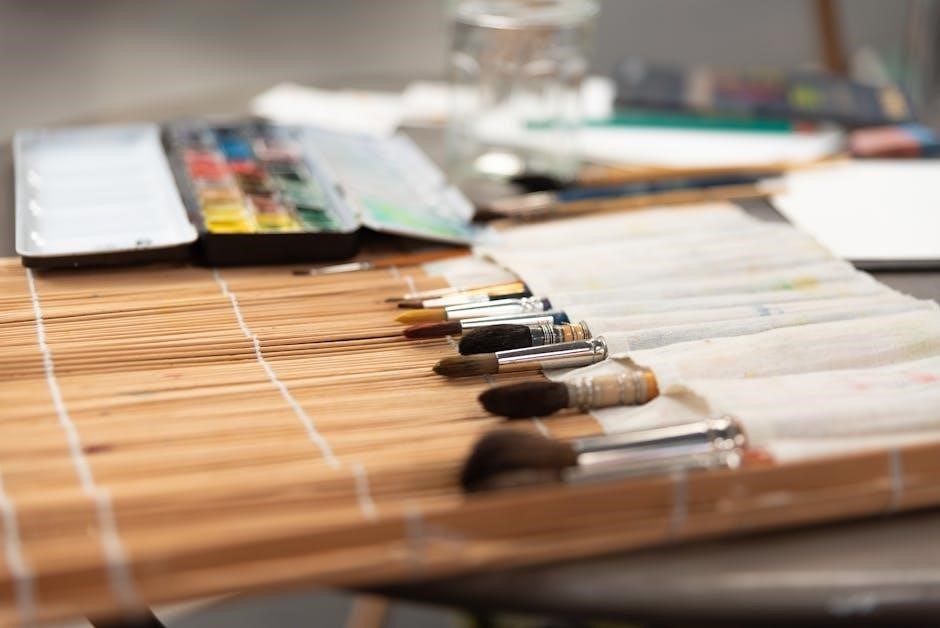
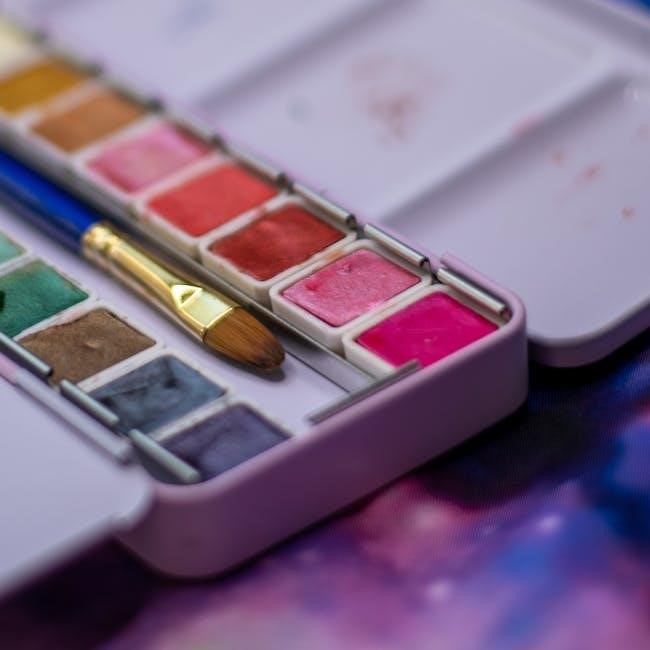
Essential Watercolor Supplies for Beginners
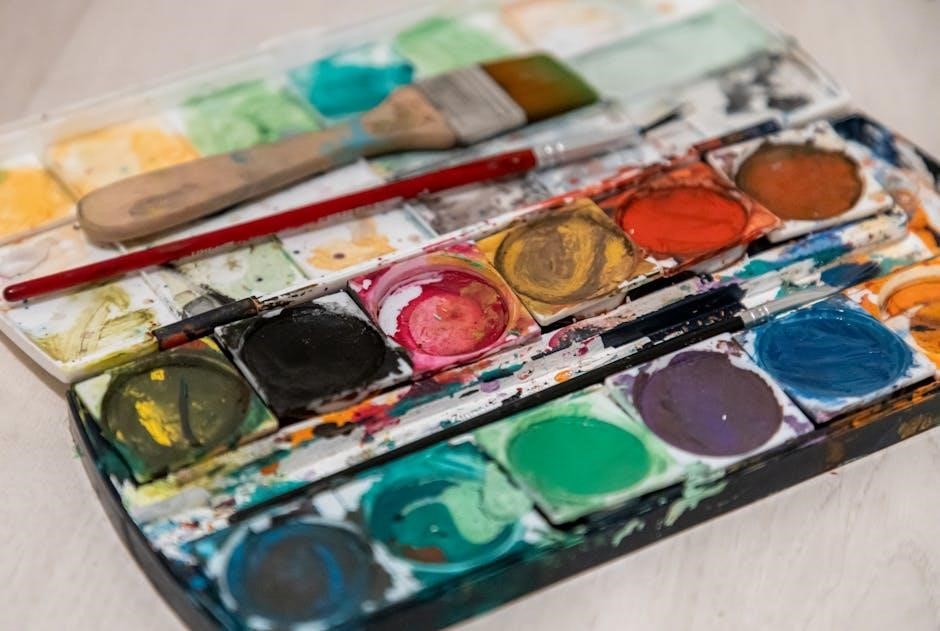
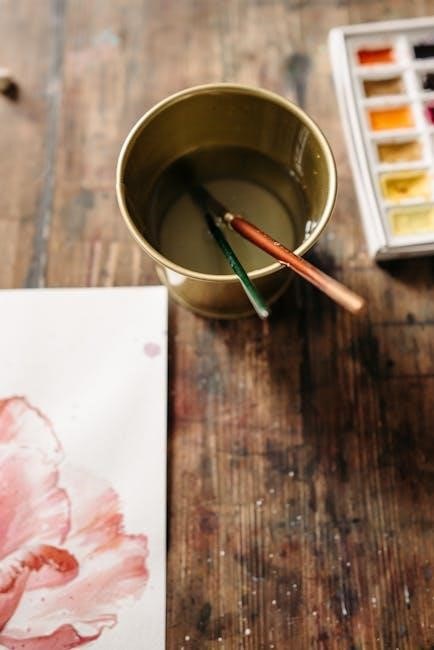
Starting watercolor painting requires specific tools: paints, paper, brushes, and a palette․ Selecting quality materials enhances the learning experience and artistic outcomes․
Watercolor Paints: Types and Recommendations
Choosing watercolor paints can feel overwhelming, but understanding the types is key․ Pan paints are convenient and portable, ideal for beginners due to their ease of use and controlled application․ They’re pre-dried cakes of color activated with water․
Tube paints offer richer pigmentation and allow for more control over color mixing․ These are squeezed onto a palette and diluted․ For beginners, a student-grade set is a cost-effective starting point․ Brands like Winsor & Newton Cotman or Van Gogh are excellent choices․
Consider a basic palette with primary colors (red, yellow, blue) plus a few earth tones․ As you progress, you can expand your collection․ Experimenting with different brands and pigment qualities will help you discover your preferences and achieve desired effects in your watercolor paintings․
Watercolor Paper: Choosing the Right Weight and Texture
Selecting the right watercolor paper is crucial for successful painting․ Paper weight, measured in pounds (lbs) or grams per square meter (gsm), determines its thickness and ability to handle water․ 140lb (300gsm) paper is generally recommended for beginners, as it resists buckling and warping when wet․
Paper texture also impacts the final result․ Cold press paper has a slightly textured surface, versatile for various techniques․ Hot press paper is smooth, ideal for detailed work and fine lines․ Rough paper has a pronounced texture, creating interesting granular effects․
For practice, inexpensive paper is fine, but for finished pieces, invest in quality watercolor paper․ Cotton paper is superior to wood pulp paper, offering better absorbency and durability․ Experiment with different textures to discover what suits your style!
Brushes: Round, Flat, and Specialty Brushes
Watercolor brushes significantly influence your painting style․ Round brushes are versatile, excellent for detail work, washes, and varying line widths․ Their pointed tip allows precision, while the belly holds ample water․ Flat brushes are ideal for broad strokes, washes, and creating sharp edges․
Specialty brushes, like rigger brushes (long, thin) and fan brushes, offer unique effects․ Rigger brushes excel at fine lines and details, while fan brushes create textures like grass or hair․ Brush material matters; sable brushes hold the most water but are expensive․
Synthetic brushes are affordable and durable, suitable for beginners․ Experiment with different brush sizes and shapes to discover their capabilities․ Proper brush care—cleaning and shaping—extends their lifespan․
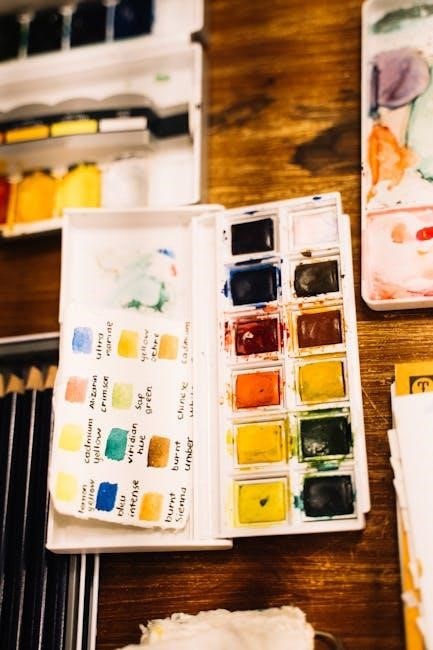
Palette Options: Plastic, Ceramic, and Portable Palettes
Choosing the right palette enhances your watercolor experience․ Plastic palettes are affordable, lightweight, and easy to clean, making them ideal for beginners․ Ceramic palettes offer a smooth surface for effortless color mixing and are less prone to staining, though they can be fragile․
Portable palettes, often with lids, are perfect for painting outdoors or on the go․ These come in various materials, including plastic and metal, and often include mixing areas and wells for paint; Consider palettes with ample mixing space to avoid color contamination․
White palettes are best for accurate color assessment․ Some palettes feature wells to keep paints separate and prevent muddiness․ Experiment to find a palette that suits your workflow and painting style․
Basic Watercolor Techniques
Watercolor techniques like wet-on-wet, wet-on-dry, and dry brush are foundational skills․ Mastering these allows for varied textures and expressive painting․
Wet-on-Wet Technique
The wet-on-wet technique involves applying watercolor paint to already dampened paper․ This creates soft, diffused edges and beautiful, unpredictable blends, perfect for skies, backgrounds, and ethereal effects․ Tutorials emphasize pre-wetting the paper evenly, ensuring a consistent sheen before applying color․
Beginners often find this technique challenging, as controlling the paint flow requires practice․ However, the results – soft gradients and atmospheric washes – are incredibly rewarding․ PDF tutorials often demonstrate how varying the amount of water on both the paper and brush impacts the final outcome․ Experimentation is key! Embrace the fluidity and allow the colors to mingle organically, creating unique and captivating effects․ Mastering this technique unlocks a world of expressive possibilities in watercolor painting․
Wet-on-Dry Technique
The wet-on-dry technique, a foundational watercolor method, involves applying wet paint onto dry paper․ This yields crisp, defined edges and greater control over color placement, ideal for detailed work and precise shapes․ Tutorials often highlight the importance of brush control and layering to build up intensity․
Unlike the fluid nature of wet-on-wet, this technique demands a more deliberate approach․ PDF guides demonstrate how to achieve sharp lines and intricate details by managing the water content in your brush․ It’s excellent for rendering textures, adding highlights, and creating contrast․ Mastering wet-on-dry allows for building layers gradually, achieving depth and realism in your watercolor paintings․ Practice controlling your brushstrokes and water ratio for optimal results․
Dry Brush Technique
The dry brush technique in watercolor painting involves using a brush with very little water, creating textured, broken color effects․ Tutorial PDFs emphasize loading the brush with pigment and then wiping off most of the moisture onto a paper towel before application․ This results in a scratchy, granular appearance, perfect for depicting rough surfaces like wood, stone, or foliage․
This technique excels at adding visual interest and simulating texture․ Watercolor guides demonstrate how varying pressure and brush angle impacts the effect․ It’s a fantastic method for creating highlights, suggesting form, and adding a unique artistic flair․ Experiment with different brush types – stiffer brushes work best – and paper textures to explore the full potential of this versatile watercolor approach;
Lifting Color
Lifting color is a crucial watercolor technique demonstrated in many tutorial PDFs, allowing artists to correct mistakes or create highlights․ It involves removing wet or damp paint from the paper using a clean, damp brush, paper towel, or sponge․ The timing is key; lifting is most effective while the paint is still workable․
PDF tutorials often showcase different lifting methods, from gentle blotting for subtle lightening to more aggressive scrubbing for complete removal․ Understanding paper absorbency is vital, as some papers lift more easily than others․ Mastering this skill provides control and flexibility, enabling artists to refine details, create atmospheric effects, and rescue areas that didn’t quite turn out as planned․ It’s a fundamental skill for watercolor success․
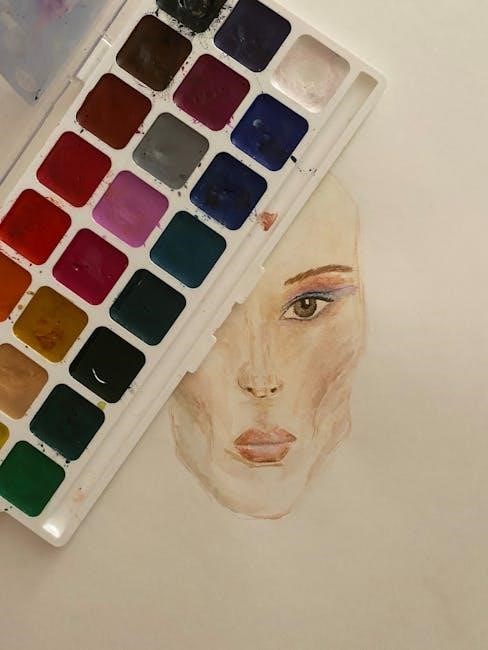
Color Mixing Fundamentals
Watercolor painting tutorial PDFs emphasize color theory, teaching how to blend hues and values․ Mastering this unlocks limitless color possibilities for artists․
Understanding the Color Wheel
Watercolor painting tutorial PDFs consistently highlight the color wheel as a foundational element․ It’s the visual representation of color relationships, crucial for harmonious mixing․ Primary colors – red, yellow, and blue – form the base, unable to be created by mixing others․
Secondary colors (orange, green, and violet) emerge from blending primaries․ Tertiary colors result from mixing a primary and a neighboring secondary color․ Understanding these relationships allows for predictable and controlled color creation․
PDFs often demonstrate how complementary colors (opposite on the wheel) create contrast and vibrancy when mixed, while analogous colors (adjacent) offer a harmonious, soothing effect․ This knowledge empowers artists to achieve desired moods and effects in their watercolor paintings․
Creating Secondary and Tertiary Colors
Watercolor painting tutorial PDFs dedicate significant attention to color mixing, starting with secondary colors․ Orange is created by blending red and yellow, green from yellow and blue, and violet by mixing red and blue․ Mastering these combinations unlocks a wider palette․
Tertiary colors, formed by mixing a primary and adjacent secondary color, add nuance․ Examples include red-violet, blue-violet, blue-green, yellow-green, yellow-orange, and red-orange․ PDFs emphasize gradual addition of color for control․
These tutorials often demonstrate how varying the proportions of primary colors influences the resulting tertiary shade․ Experimentation is key! Understanding these mixes allows artists to move beyond pre-mixed paints and achieve unique, personalized hues in their watercolor paintings․
Achieving Different Values and Tones
Watercolor painting tutorial PDFs stress the importance of value – the lightness or darkness of a color – for creating depth and form․ Value is adjusted by adding water to lighten a hue, or more pigment to darken it․ These PDFs often include value scales for practice․
Tone refers to a color’s purity or intensity․ Adding a complementary color will dull a tone, creating a more muted effect․ Grays can also be introduced to reduce intensity․ Tutorials demonstrate glazing techniques, layering washes to build value gradually․
Understanding value and tone is crucial for realistic watercolor paintings․ PDFs often include exercises focusing on creating smooth gradients and contrasting values to enhance visual impact and dimensionality․
Simple Watercolor Projects for Beginners
Watercolor painting tutorial PDFs frequently include beginner projects like painting leaves, flowers, and basic landscapes to practice fundamental techniques and build confidence․
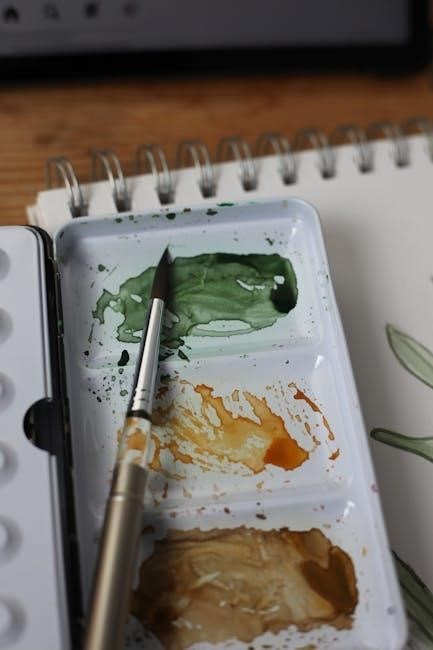
Painting Basic Leaves
Watercolor painting tutorial PDFs often begin with simple subjects like leaves, ideal for mastering foundational skills․ Start by lightly sketching a leaf shape – don’t press too hard! Then, using a wet-on-wet technique, apply a wash of green, allowing the color to naturally blend and create variations․
Experiment with different shades of green by mixing your primary colors․ Add subtle veins using a fine-tipped brush and a slightly darker green or brown․ Remember to let each layer dry before adding another to prevent muddying the colors․
Many tutorials demonstrate layering techniques to achieve depth and realism․ Practice painting various leaf shapes and sizes to develop your observation skills and brush control․ These exercises build a strong base for more complex watercolor projects․
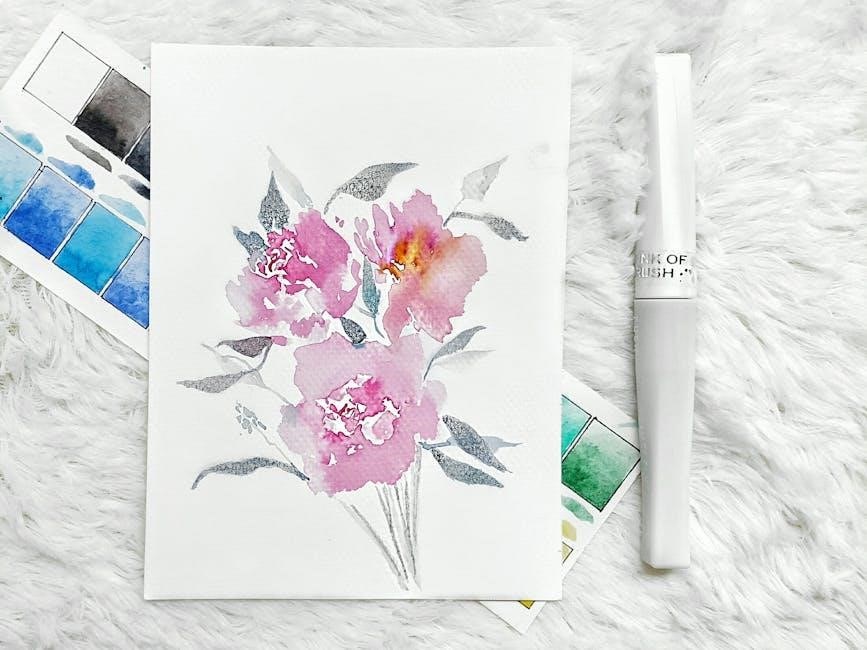
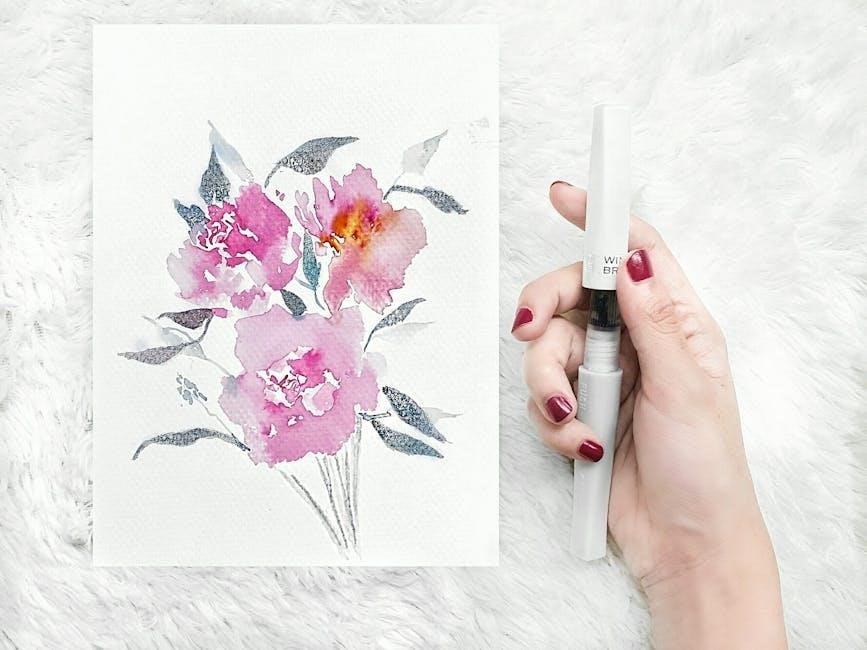
Painting Simple Flowers
Watercolor painting tutorial PDFs frequently include lessons on painting basic flowers, building upon the skills learned with leaves․ Begin with a light pencil sketch of a simple flower shape, like a daisy or a poppy․ Utilize the wet-on-wet technique for the petals, applying a delicate wash of color – yellows, pinks, or reds work well․
Gradually build up the color intensity with multiple layers, allowing each layer to dry․ Introduce subtle shading to create dimension and form․ A fine-tipped brush is perfect for adding details like the flower’s center and stem․
Explore color mixing to achieve unique floral hues․ Many tutorials emphasize loose, expressive brushstrokes to capture the flower’s natural beauty․ Practice different flower types to expand your repertoire and refine your technique․
Creating a Basic Landscape
Watercolor painting tutorial PDFs often guide beginners through creating simple landscapes, building on foundational techniques․ Start with a light pencil sketch outlining the horizon line, hills, and any prominent features like trees or buildings․ Apply a wash of pale blue or lavender for the sky, utilizing the wet-on-wet technique for soft gradients․
Layer subsequent washes to build depth and atmosphere․ Use varying shades of green and brown for the land, employing dry brush techniques to suggest texture in fields or foliage․ Introduce distant mountains with muted tones to create a sense of perspective․
Remember to preserve highlights by lifting color with a clean, damp brush․ These tutorials emphasize simplifying shapes and focusing on capturing the overall mood of the landscape․
Advanced Techniques & Resources
Watercolor painting tutorial PDFs expand skills with mixed media—ink, gesso, and collage—offering creative exploration beyond traditional methods for artistic expression․
Watercolor with Ink Techniques
Watercolor and ink create dynamic artwork, blending fluidity with defined lines․ Tutorial PDFs demonstrate layering watercolor washes over ink drawings for depth and texture, or applying ink onto dried watercolor for intricate details․
Explore techniques like using waterproof ink for underpainting, allowing watercolor to flow freely without bleeding․ Conversely, experiment with non-waterproof inks to achieve blended, ethereal effects as the watercolor interacts with the ink lines․ Many free watercolor tutorials showcase these methods․
PDF resources often include guidance on pen types – fine liners, brush pens – and ink properties, helping you control the interaction between mediums․ Discover how to create stunning contrast and visual interest by mastering this versatile combination․
Watercolor with Gesso Techniques
Watercolor and gesso unlock unique textural possibilities․ Tutorial PDFs reveal how applying gesso – an acrylic primer – creates a receptive surface for watercolor, offering varying degrees of tooth and absorbency․ This allows for interesting effects unattainable on standard watercolor paper․
Explore techniques like applying gesso in patterns or layers to build dimension, then painting with watercolor to highlight the textures․ Free watercolor tutorials often demonstrate creating stencils with gesso for crisp designs or using it to resist watercolor, leaving white or lightly toned areas․
PDF resources guide you through gesso application methods and watercolor layering, helping you control the interaction between mediums․ Experiment with different gesso colors to subtly influence your watercolor washes, adding depth and complexity to your artwork․
Watercolor with Collage Elements
Watercolor and collage create dynamic, mixed-media artworks․ Tutorial PDFs demonstrate integrating diverse materials – paper, fabric, found objects – with watercolor washes for layered effects․ This technique adds texture, visual interest, and narrative depth to paintings․
Free watercolor tutorials often showcase adhering collage elements to watercolor paper before applying paint, allowing the watercolor to settle around the textures․ Alternatively, paint first, then collage, creating a different visual relationship․ Learn to seal collage elements to prevent buckling or lifting․
PDF resources guide you through adhesive choices, material compatibility, and watercolor application techniques․ Explore creating focal points with collage or building entire compositions from layered elements, enhancing your artistic expression․
Finding and Downloading Free Watercolor PDFs
Free watercolor PDFs are readily available on reputable websites, offering tutorials, templates, and workbooks to enhance your painting journey and skills․
Explore online resources for printable templates and in-depth learning materials, perfect for beginners and experienced artists alike․
Reputable Websites Offering Free Tutorials
Numerous online platforms generously provide free watercolor painting tutorials in PDF format, catering to all skill levels․ Many artists and art educators share their expertise through downloadable guides․ Websites dedicated to art instruction, like those offering broader creative courses, frequently include a section specifically for watercolor techniques․
Look for platforms that host a variety of tutorials, covering basic washes to more complex projects․ Some sites offer complete beginner courses as downloadable PDFs, while others provide individual lessons focusing on specific techniques like wet-on-wet or color mixing․ Checking art blogs and online communities is also beneficial, as artists often share free resources with their followers․ Remember to verify the source’s credibility to ensure quality instruction․
Utilizing Free Watercolor Templates & Printables
Free watercolor templates and printables are excellent resources for beginners, offering pre-drawn outlines to practice painting within defined shapes․ These resources remove the initial drawing hurdle, allowing artists to focus solely on watercolor techniques and color application․ You can find a range of templates, from simple leaf and flower designs to more intricate landscapes and patterns․
Printables often include guidelines or suggested color palettes, further simplifying the learning process․ Utilizing these tools helps build confidence and develop brush control․ Several websites offer downloadable templates, categorized by difficulty level – easy for novices and challenging for those seeking refinement․ Experimenting with different templates fosters creativity and expands your watercolor skillset․
Resources for In-Depth Learning (Workbooks)
For a more structured and comprehensive learning experience, consider investing in a dedicated watercolor workbook․ These resources typically expand upon free tutorials, offering detailed explanations, step-by-step demonstrations, and progressive exercises․ Workbooks often delve deeper into color theory, composition, and advanced techniques like layering and glazing․
They provide ample space for practice and experimentation, encouraging artists to develop their unique style․ A well-crafted workbook acts as a personal mentor, guiding you through the intricacies of watercolor painting․ Look for workbooks that align with your skill level and artistic goals․ They are a valuable supplement to free PDFs, providing a focused path to mastery․