
The Harley rear wheel assembly is a critical component‚ ensuring stability and performance. It includes a laced wheel‚ hub assembly‚ bearings‚ and spacers‚ designed for durability and precision.
Tools and Materials Required
To assemble the Harley rear wheel‚ you’ll need specific tools and materials. Essential tools include a torque wrench‚ socket set‚ wrenches‚ pliers‚ and a bearing press. Materials required are grease for lubrication‚ new bearings‚ spacers‚ and axle nuts. Additional items like cleaning solvents and a wheel truing stand may be necessary for precise assembly. Ensure all components are compatible with your Harley model to maintain safety and performance. Proper tools and materials are crucial for a successful and durable rear wheel assembly. Always refer to the manufacturer’s specifications for exact requirements and torque values to avoid damage or safety hazards.
Understanding the Rear Wheel Components
The Harley rear wheel consists of a hub assembly‚ laced wheel‚ bearings‚ and spacers. These components work together to provide stability‚ support‚ and smooth operation of the motorcycle.
3.1. Hub Assembly
The hub assembly is the central part of the rear wheel‚ containing bearings‚ seals‚ and a sleeve. It is designed to rotate smoothly‚ supporting the wheel and ensuring proper alignment. The hub is typically pre-assembled with bearings and seals‚ making installation straightforward. Proper lubrication and alignment are crucial for optimal performance. The hub assembly also includes a spacer to maintain correct wheel positioning‚ ensuring even load distribution and preventing wear on other components. Regular inspection and maintenance of the hub assembly are essential to avoid damage and ensure the motorcycle’s safety and reliability on the road.
3.2. Wheel
The rear wheel is a 16-inch laced design‚ offering both strength and style. It features a chrome disc or black finish‚ enhancing the motorcycle’s aesthetic appeal. The wheel is built to withstand heavy loads and provide a smooth ride. Proper installation involves ensuring the wheel is securely attached to the hub assembly with spokes‚ which must be tightened evenly to maintain balance. The wheel’s durability is further enhanced by its construction‚ making it suitable for various road conditions. Regular inspection of the wheel for damage or wear is essential to ensure safety and performance. The laced design also allows for easier maintenance and customization options for riders seeking personalized aesthetics.
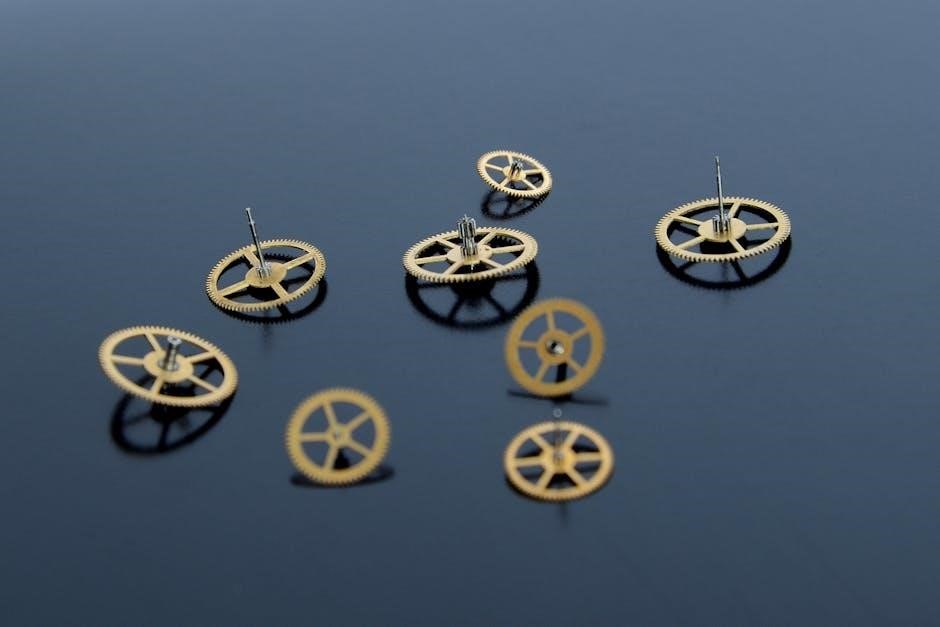
3.3. Bearings
Bearings are essential for smooth rotation and load handling in the rear wheel assembly. They are typically pre-installed in the hub assembly‚ along with seals and sleeves‚ to ensure proper alignment and function. The bearings are designed to withstand heavy loads and provide long-lasting performance. Proper installation involves pressing the bearings into the hub‚ ensuring they are seated correctly in their grooved depressions. Regular inspection is crucial to identify wear or damage‚ which can lead to vibration or instability. Bearings should be replaced if they show signs of wear‚ and new ones must be greased and aligned precisely for optimal performance. Their durability and reliability are key to maintaining the integrity of the rear wheel assembly.
3.4. Spacers
Spacers are critical components in the Harley rear wheel assembly‚ ensuring proper alignment and spacing within the hub assembly. They are typically positioned on either side of the bearings to maintain correct positioning and prevent excessive movement. Made from durable materials‚ spacers are designed to withstand the stresses of riding and provide a snug fit between the hub and the wheel. Proper installation of spacers is essential to ensure the wheel rotates smoothly and remains stable. If spacers are misaligned or damaged‚ it can lead to improper wheel alignment and potential wear on other components. Regular inspection of spacers is recommended to maintain optimal performance and safety.
Preparing the Hub Assembly
Preparing the hub assembly involves inspecting and cleaning the hub to ensure a smooth installation of bearings and spacers. Proper preparation is crucial for optimal performance.
4.1. Inspecting the Hub
Inspecting the hub is essential to ensure it is free from damage or wear. Check for cracks‚ rust‚ or excessive wear on the bearing surfaces. Use a precision tool to measure the hub’s roundness and ensure it meets specifications. Look for any signs of pitting or scoring‚ which could indicate previous bearing failure. If any damage is found‚ the hub may need to be replaced. Clean the hub thoroughly with a solvent to remove grease and debris before proceeding. This step ensures a proper foundation for installing new bearings‚ guaranteeing smooth operation and longevity of the rear wheel assembly.
4.2. Cleaning the Hub
Cleaning the hub is a crucial step to ensure proper bearing installation and functionality. Start by removing any grease‚ dirt‚ or old bearing residue using a high-quality solvent and a stiff-bristle brush. Scrub all surfaces thoroughly‚ paying special attention to the bearing seats and recesses. Use compressed air to dry the hub and remove any remaining solvent or debris. Inspect the hub again for any remaining contaminants or damage. A clean hub ensures optimal contact with the new bearings‚ preventing premature wear and ensuring smooth operation. This step is foundational for the entire assembly process and cannot be overlooked for long-term reliability.
Installing the Bearings
Bearing installation requires precision to ensure proper fitment and function. Use specialized tools to press bearings into the hub‚ ensuring alignment and avoiding damage.
5.1. Bearing Installation Techniques
Bearing installation techniques involve using a bearing press or a hammer with a punch to ensure proper seating. Apply grease to the hub and bearing surfaces for smooth installation. Align the bearing with the hub’s recess‚ ensuring it is flush. Use a press to drive the bearing into place‚ applying even pressure. Avoid using brute force‚ as it can damage the bearing or hub; Once installed‚ inspect the bearing for any signs of misalignment or damage. Proper installation ensures optimal performance and longevity of the rear wheel assembly.
5.2. Securing the Bearings
Securing the bearings involves installing the retaining rings or clips to prevent movement. Apply a thin layer of grease to the bearing surfaces for lubrication. Insert the bearings into their respective races‚ ensuring they are fully seated. Use a bearing press to compress the bearings firmly into place. Once installed‚ check the bearings for proper alignment and movement by gently spinning the wheel. Ensure the retaining rings are securely fastened to hold the bearings in position. Properly securing the bearings is crucial for maintaining wheel stability and preventing wear during operation. Follow the manufacturer’s torque specifications for all bolts and fasteners involved in this process.

Assembling the Rear Wheel
Assembling the rear wheel involves securely attaching the wheel to the hub assembly‚ ensuring proper alignment and spacing with spacers. Lacing the spokes requires precise tensioning in a star pattern for even distribution. Tightening the spokes to the correct torque specifications ensures stability and safety. Properly aligning and securing the wheel with the axle is crucial for maintaining balance and preventing wear. Following the manufacturer’s guidelines ensures a safe and reliable assembly. This step is vital for the overall functionality and safety of the motorcycle.
6.1. Lacing the Spokes
Lacing the spokes is a meticulous process requiring precision to ensure proper tension and alignment. Begin by attaching the first spoke to the hub‚ aligning it with the rim hole. Follow a star pattern‚ alternating sides to maintain even stress distribution. Tighten each nipple gradually‚ ensuring equal tension across all spokes. Use a spoke wrench to torque nipples to the manufacturer’s specifications. After lacing‚ check the wheel for trueness by spinning it and inspecting for wobbling or unevenness. Adjust spokes as needed to achieve a balanced assembly. Proper lacing ensures a stable and durable rear wheel‚ essential for optimal performance and safety.
6.2. Tightening the Spokes
Tightening the spokes is a critical step to ensure the wheel’s structural integrity. Using a torque wrench‚ tighten each spoke nipple in a staggered pattern to avoid uneven stress. Begin with the first spoke‚ apply the recommended torque‚ and proceed to the next in a sequential manner. Repeat this process until all spokes are evenly tightened. Check the wheel’s trueness by spinning it and inspecting for wobbling or side-to-side movement. If necessary‚ adjust the spokes to achieve proper alignment; Over-tightening can damage the rim‚ while under-tightening may lead to loosening over time. Ensure all spokes are tightened to the manufacturer’s specified torque to guarantee safety and performance.

Attaching the Wheel to the Hub Assembly
Attaching the wheel to the hub assembly requires precision to ensure proper alignment and functionality. Begin by aligning the wheel’s center hole with the hub’s axle. Carefully slide the wheel onto the axle‚ ensuring the spacers are correctly positioned. Secure the wheel using the axle nuts‚ tightening them by hand to hold the wheel in place. Use a torque wrench to tighten the nuts to the manufacturer’s specified torque value. Double-check the alignment to ensure the wheel is straight and properly seated; Finally‚ verify that the wheel spins freely without wobbling or binding. Proper attachment ensures safety‚ performance‚ and even wear of the wheel and hub components.
Securing the Wheel with the Axle
Align the axle with the hub‚ ensuring proper fitment. Tighten the axle nuts evenly‚ using a torque wrench to meet the specified torque value for security and stability.
8.1. Aligning the Axle
Proper axle alignment is essential for secure and balanced wheel installation. Begin by ensuring the axle is straight and free from damage. Visually inspect the hub assembly to confirm the axle slots are aligned with the wheel bearings. Use a torque wrench to gently guide the axle into place‚ ensuring it seats evenly within the hub. If the axle is slightly misaligned‚ carefully adjust its position without forcing it‚ as this could damage the bearings or hub. Once aligned‚ proceed with tightening the axle nuts in a star pattern to maintain even pressure and prevent wheel wobble; Always refer to Harley-Davidson’s torque specifications for precise tightening values.
Double-check the axle alignment after tightening to ensure proper fitment and safety.
8.2. Tightening the Axle Nuts
Tightening the axle nuts is a critical step to ensure the rear wheel is securely fastened to the hub assembly. Using a torque wrench‚ tighten the nuts in a star pattern to avoid uneven pressure. Apply the recommended torque specification‚ typically around 60-70 ft-lbs for most Harley-Davidson models. Ensure the nuts are snug but not over-tightened‚ as this could damage the axle or bearings. Double-check the alignment of the axle after tightening to confirm proper seating and balance. Refer to the Harley-Davidson manual for exact torque values specific to your model year and configuration. Properly tightened axle nuts are essential for safety and optimal performance.
Regular maintenance should include checking the torque of these nuts to ensure they remain secure over time.
Final Torque Specifications
Ensuring proper torque specifications is crucial for the safe and efficient operation of the Harley rear wheel assembly. Refer to the factory manual for exact values‚ as they vary by model year and configuration. Typically‚ axle nuts are torqued to 60-70 ft-lbs‚ while bearing adjusters may require 10-15 ft-lbs. All fasteners should be tightened in a star pattern to maintain even pressure and prevent warping. Double-check all torque values to confirm they meet manufacturer guidelines; Proper torque ensures longevity‚ safety‚ and optimal performance of the rear wheel assembly. Always verify specifications with the official Harley-Davidson manual for your specific model to avoid over- or under-tightening components.

Troubleshooting Common Issues
Common issues with Harley rear wheel assembly include misaligned wheels‚ loose bearings‚ or incorrect spoke tension. If the wheel wobbles‚ check for uneven spoke tightening or bent rims. Bearings that feel gritty or loose may need replacement. Ensure spacers are correctly installed to maintain proper alignment. If the axle nuts are over-tightened‚ it can cause bearing failure. Refer to the diagram for correct assembly order. Addressing these issues promptly prevents further damage and ensures smooth operation. Always consult the official Harley-Davidson manual for specific troubleshooting steps tailored to your model. Regular inspections can help identify and resolve problems before they escalate.